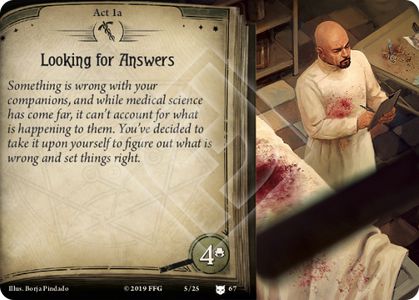
주요목적. Stage 4
Objective - Find a way off the Moon. (You will be instructed when to advance.)
선장 - Back
(→R1)
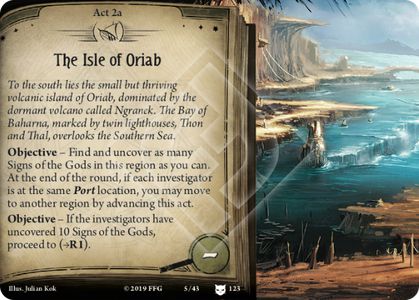
주요목적. Stage 2
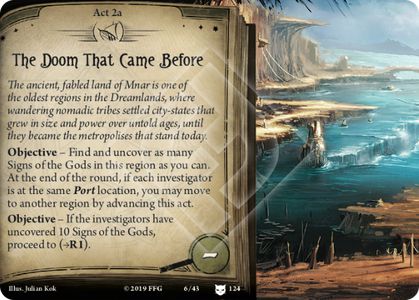
Objective - Find and uncover as many Signs of the Gods in this region as you can. At the end of the round, if each investigator is at the same Port location, you may move to another region by advancing this act.
Objective - If the investigators have uncovered 10 Signs of the Gods, proceed to (→R1).
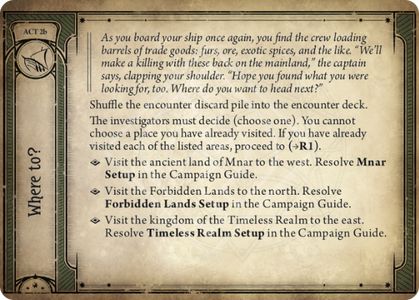
어디로 향할까요? - Back
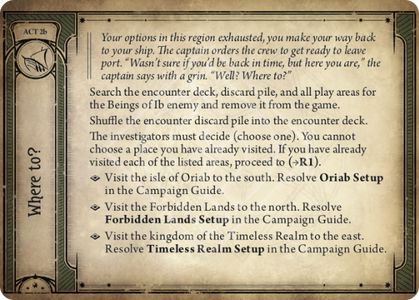
Shuffle the encounter discard pile into the encounter deck.
The investigators must decide (choose one). You cannot choose a place you have already visited. If you have already visited each of the listed areas, proceed to (→R1).
- Visit the ancient land of Mnar to the west. Resolve Mnar Setup in the Campaign Guide.
- Visit the Forbidden Lands to the north. Resolve Forbidden Lands Setup in the Campaign Guide.
- Visit the kingdom of the Timeless Realm to the east. Resolve Timeless Realm Setup in the Campaign Guide.
주요목적. Stage 2
Objective - Find and uncover as many Signs of the Gods in this region as you can. At the end of the round, if each investigator is at the same Port location, you may move to another region by advancing this act.
Objective - If the investigators have uncovered 10 Signs of the Gods, proceed to (→R1).
어디로 향할까요? - Back
Search the encounter deck, discard pile, and all play areas for The Crawling Mist enemy and remove it from the game.
Shuffle the encounter discard pile into the encounter deck.
The investigators must decide (choose one). You cannot choose a place you have already visited. If you have already visited each of the listed areas, proceed to (→R1).
- Visit the isle of Oriab to the south. Resolve Oriab Setup in the Campaign Guide.
- Visit the ancient land of Mnar to the west. Resolve Mnar Setup in the Campaign Guide.
- Visit the Forbidden Lands to the north. Resolve Forbidden Lands Setup in the Campaign Guide.


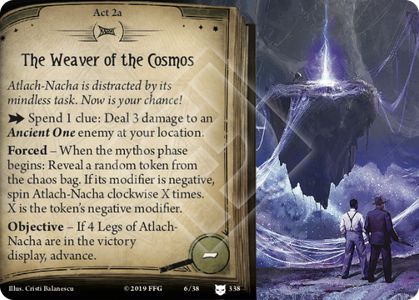
주요목적. Stage 2
Spend 1 clue: Deal 3 damage to an Ancient One enemy at your location.
Forced - When the mythos phase begins: Reveal a random token from the chaos bag. If its modifier is negative, spin Atlach-Nacha clockwise X times. X is the token's negative modifier.
Objective - If 4 Legs of Atlach-Nacha are in the victory display, advance.
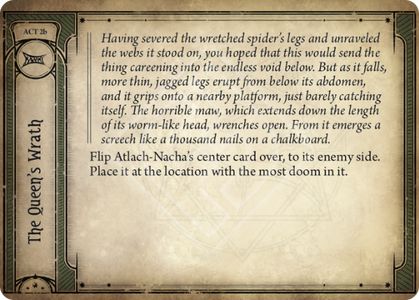
여왕의 진노 - Back
Flip Atlach-Nacha's center card over, to its enemy side. Place it at the location with the most doom in it.
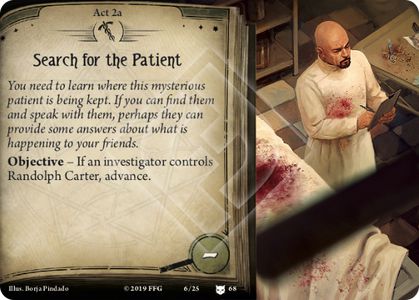
주요목적. Stage 2
Objective - If an investigator controls Randolph Carter, advance.
랜돌프 카터의 진술 - Back
Shuffle the encounter discard pile into the encounter deck.
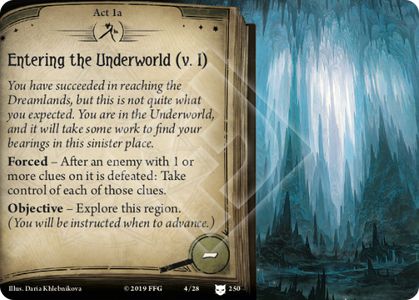
주요목적. Stage 1
Forced - After an enemy with 1 or more clues on it is defeated: Take control of each of those clues.
Objective - Explore this region. (You will be instructed when to advance.)
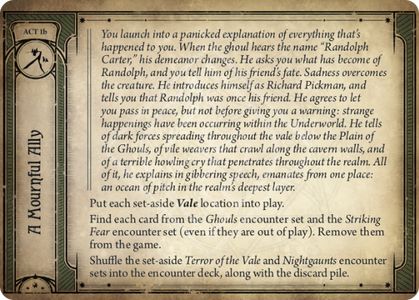
슬픔에 빠진 동료 - Back
Put each set-aside Vale location into play.
Find each card from the Ghouls encounter set and the Striking Fear encounter set (even if they are out of play). Remove them from the game.
Shuffle the set-aside Terror of the Vale and Nightgaunts encounter sets into the encounter deck, along with the discard pile.
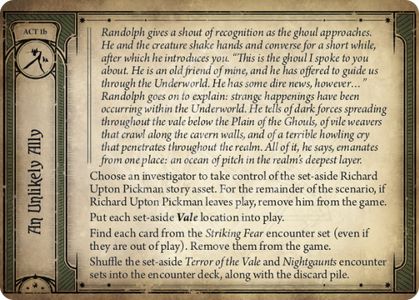
주요목적. Stage 1
Forced - After an enemy with 1 or more clues on it is defeated: Take control of each of those clues.
Objective - Find Richard Upton Pickman. (You will be instructed when to advance.)
예상 밖의 동료 - Back
Choose an investigator to take control of the set-aside Richard Upton Pickman story asset. For the remainder of the scenario, if Richard Upton Pickman leaves play, remove him from the game.
Put each set-aside Vale location into play.
Find each card from the Striking Fear encounter set (even if they are out of play). Remove them from the game.
Shuffle the set-aside Terror of the Vale and Nightgaunts encounter sets into the encounter deck, along with the discard pile.

주요목적. Stage 4
Spend 1 clue: Look at the top 3 cards of the encounter deck. Draw each of those cards with the hidden keyword and discard the rest.
Objective - Find and expose Nyarlathotep's true form by adding copies of Nyarlathotep to the victory display. If 1 plus 1 copies are in the victory display, advance.
진정한 형체 - Back
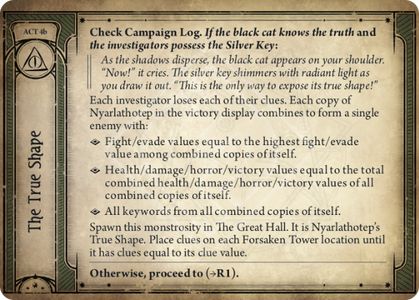
Check Campaign Log. If the black cat knows the truth and the investigators possess the Silver Key:
As the shadows disperse, the black cat appears on your shoulder. "Now!" it cries. The silver key shimmers with radiant light as you draw it out. "This is the only way to expose its true shape!"
Each investigator loses each of their clues. Each copy of Nyarlathotep in the victory display combines to form a single enemy with:
- Fight/evade values equal to the highest fight/evade value among combined copies of itself.
- Health/damage/horror/victory values equal to the total combined health/damage/horror/victory values of all combined copies of itself.
- All keywords from all combined copies of itself.
Spawn this monstrosity in The Great Hall. It is Nyarlathotep's True Shape. Place clues on each Forsaken Tower location until it has clues equal to its clue value.
Otherwise, proceed to (→R1).
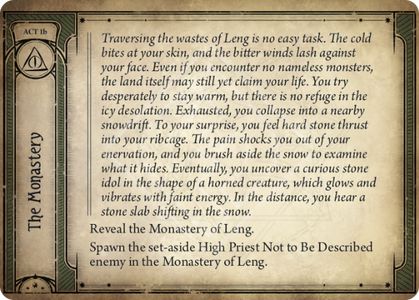
주요목적. Stage 1
수도원 - Back
Reveal the Monastery of Leng.
Spawn the set-aside High Priest Not to Be Described enemy in the Monastery of Leng.
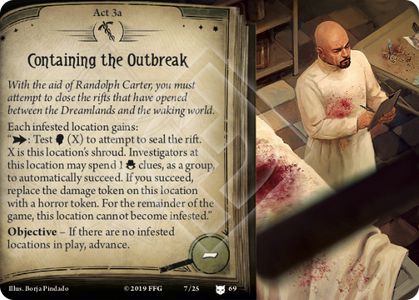
주요목적. Stage 3
Each infested location gains: ": Test (X) to attempt to seal the rift. X is this location's shroud. Investigators at this location may spend 1 clues, as a group, to automatically succeed. If you succeed, replace the damage token on this location with a horror token. For the remainder of the game, this location cannot become infested."
Objective - If there are no infested locations in play, advance.
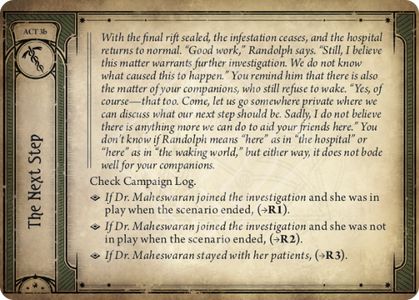
다음 단계 - Back
With the final rift sealed, the infestation ceases, and the hospital returns to normal. "Good work," Randolph says. "Still, I believe this matter warrants further investigation. We do not know what caused this to happen." You remind him that there is also the matter of your companions, who still refuse to wake. "Yes, of course— that too. Come, let us go somewhere private where we can discuss what our next step should be. Sadly, I do not believe there is anything more we can do to aid your friends here." You don't know if Randolph means "here" as in "the hospital" or
"here" as in "the waking world," but either way, it does not bode well for your companions.
Check Campaign Log.
- If Dr. Maheswaran joined the investigation and she was in play when the scenario ended, (→R1).
- If Dr. Maheswaran joined the investigation and she was not in play when the scenario ended, (→R2).
- If Dr. Maheswaran stayed with her patients , (→R3).
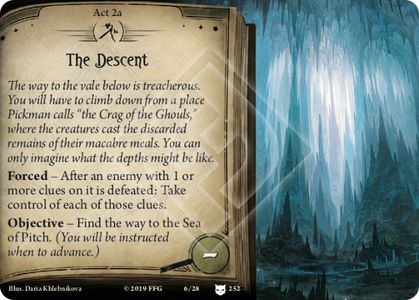
주요목적. Stage 2
Forced - After an enemy with 1 or more clues on it is defeated: Take control of each of those clues.
Objective - Find the way to the Sea of Pitch. (You will be instructed when to advance.)
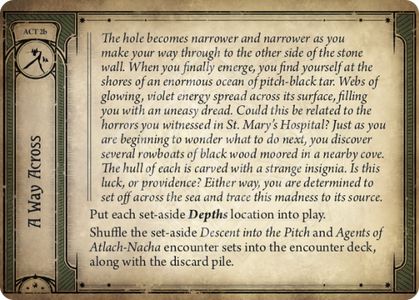
석벽을 통과해서 - Back
Put each set-aside Depths location into play.
Shuffle the set-aside Descent into the Pitch and Agents of Atlach-Nacha encounter sets into the encounter deck, along with the discard pile.
주요목적. Stage 2
Objective - Find and uncover as many Signs of the Gods in this region as you can. At the end of the round, if each investigator is at the same Port location, you may move to another region by advancing this act.
Objective - If the investigators have uncovered 10 Signs of the Gods, proceed to (→R1).
어디로 향할까요? - Back
Search the encounter deck, discard pile, and all play areas for the Beings of Ib enemy and remove it from the game.
Shuffle the encounter discard pile into the encounter deck.
The investigators must decide (choose one). You cannot choose a place you have already visited. If you have already visited each of the listed areas, proceed to (→R1).
- Visit the isle of Oriab to the south. Resolve Oriab Setup in the Campaign Guide.
- Visit the Forbidden Lands to the north. Resolve Forbidden Lands Setup in the Campaign Guide.
- Visit the kingdom of the Timeless Realm to the east. Resolve Timeless Realm Setup in the Campaign Guide.
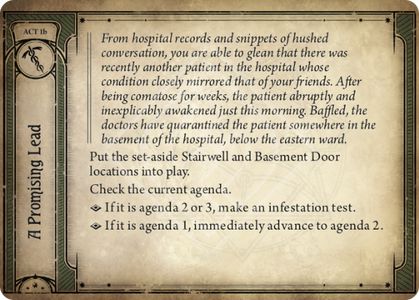
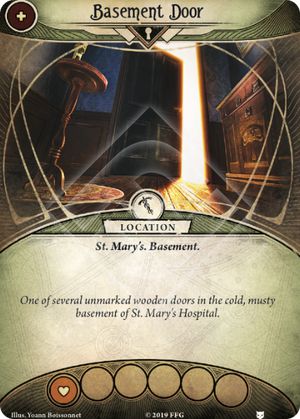
주요목적. Stage 1
유력한 실마리 - Back
Put the set-aside Stairwell and Basement Door locations into play.
Check the current agenda.
- If it is agenda 2 or 3, make an infestation test.
- If it is agenda 1, immediately advance to agenda 2.
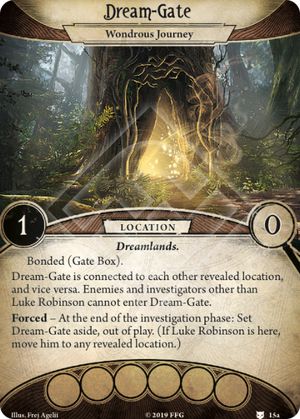
꿈 관문
경이로운 여정
장소
몽환의 땅.
결속(차원문 상자).
‘꿈 관문’은 공개된 다른 모든 장소로 이어지고, 공개된 다른 모든 장소는 ‘꿈 관문’으로 이어집니다. ‘루크 로빈슨’을 제외한 다른 조사자와 적은 ‘꿈 관문’에 들어갈 수 없습니다.
강제 – 조사 단계 끝에: ‘꿈 관문’을 비플레이 상태로 치워 둡니다. (‘루크 로빈슨’이 이 장소에 있다면, 그를 아무 공개된 장소 한 곳으로 이동시킵니다.)
꿈 관문
무의미한 현실
장소
몽환의 땅.
결속(현실로부터의 격리).
‘루크 로빈슨’을 제외한 다른 조사자와 적은 ‘꿈 관문’에 들어갈 수 없습니다.
당신이 ‘꿈 관문’을 조사하는 데 성공한 후: 이 카드를 뒤집습니다.
강제 – 조사 단계 끝에: ‘꿈 관문’을 비플레이 상태로 치워 둡니다. (‘루크 로빈슨’이 이 장소에 있다면, 그를 아무 공개된 장소 한 곳으로 이동시키고 그는 공포를 2 받습니다.)

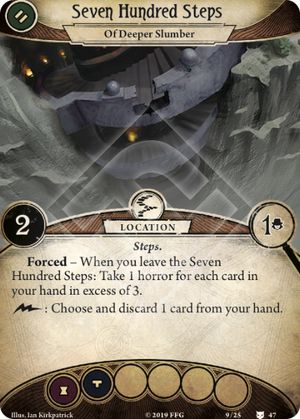
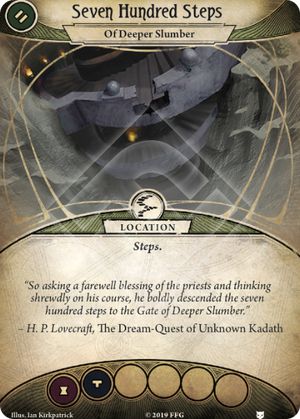
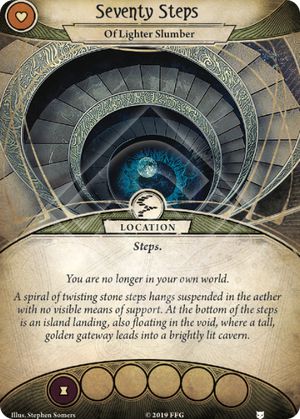
700개의 계단 - Back
700개의 계단
깊은 잠
장소
계단.
Forced - When you leave the Seven Hundred Steps: Take 1 horror for each card in your hand in excess of 3.
: Choose and discard 1 card from your hand.
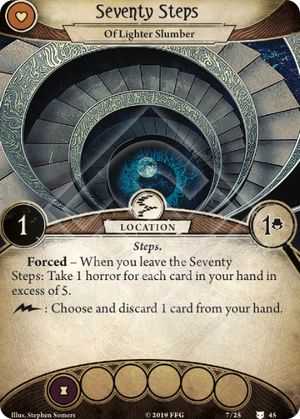
70개의 계단 - Back
A spiral of twisting stone steps hang suspended in the aether with no visible means of support. At the bottom of the steps, there is an island landing, also floating in the void, where a tall, golden gateway leads into a brightly lit cavern.
70개의 계단
얕은 잠
장소
계단.
Forced - When you leave the Seventy Steps: Take 1 horror for each card in your hand in excess of 5.
: Choose and discard 1 card from your hand.
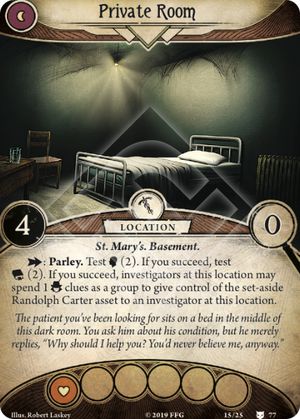
지하실 문 - Back
장소
세인트 메리 병원. 지하층.
: Parley. Test (2). If you succeed, test (2). If you succeed, investigators at this location may spend 1 clues as a group to give control of the set-aside Randolph Carter asset to an investigator at this location.
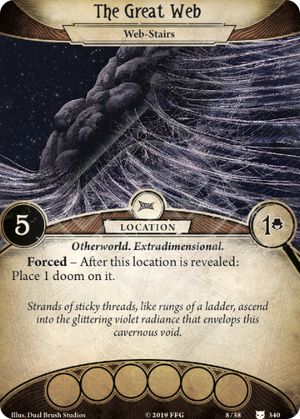
거대한 거미줄 - Back
거대한 거미줄
거미줄 계단
장소
다른 세계. 초차원.
Forced - After this location is revealed: Place 1 doom on it.
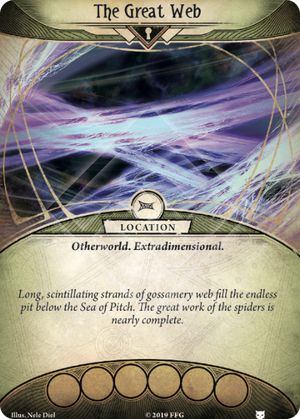
거대한 거미줄 - Back
거대한 거미줄
우주의 거미줄
장소
다른 세계. 초차원.
Forced - After you enter this location: Test (3). If you fail, you must either choose and discard 1 card from your hand for each point you failed by, or place 1 doom on this location.
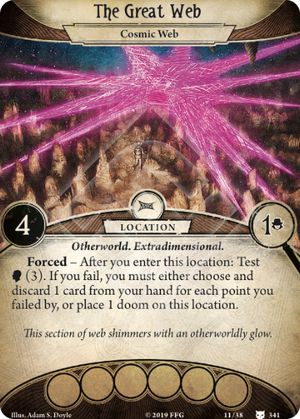

거대한 거미줄 - Back
거대한 거미줄
얽힌 거미줄
장소
다른 세계. 초차원.
Forced - When the investigation phase ends, if there is at least 1 investigator at this location: Place 1 doom on this location.